I started to buy a second hand Euming Mark 610D from finn.no (like ebay in norway)

Idea was to modify the 610D to get out a sync pulse every time the film advances in the gate. Transfer frames to a Canon 60D in video mode with sync info saved on the audio track. Use avisynth to extract progressive frames from the videofiles and do stabilisation and noise canceling.

Backlight:
A lot of other sites refer to this link: http://blog.iso50.com/23724/convert-8mm-with-5d-mark-ii/
I tried a similar point source with a small flat led, but could not get even focus, might be bad combination with the lens or something. I got a lot of blooming and fuzz round the edges.
I read videoFred's webpage and saw his diffuse backlight so i tried that. I ended up with a big (9W ?) white power led and a diffusor. I found this on ikea:


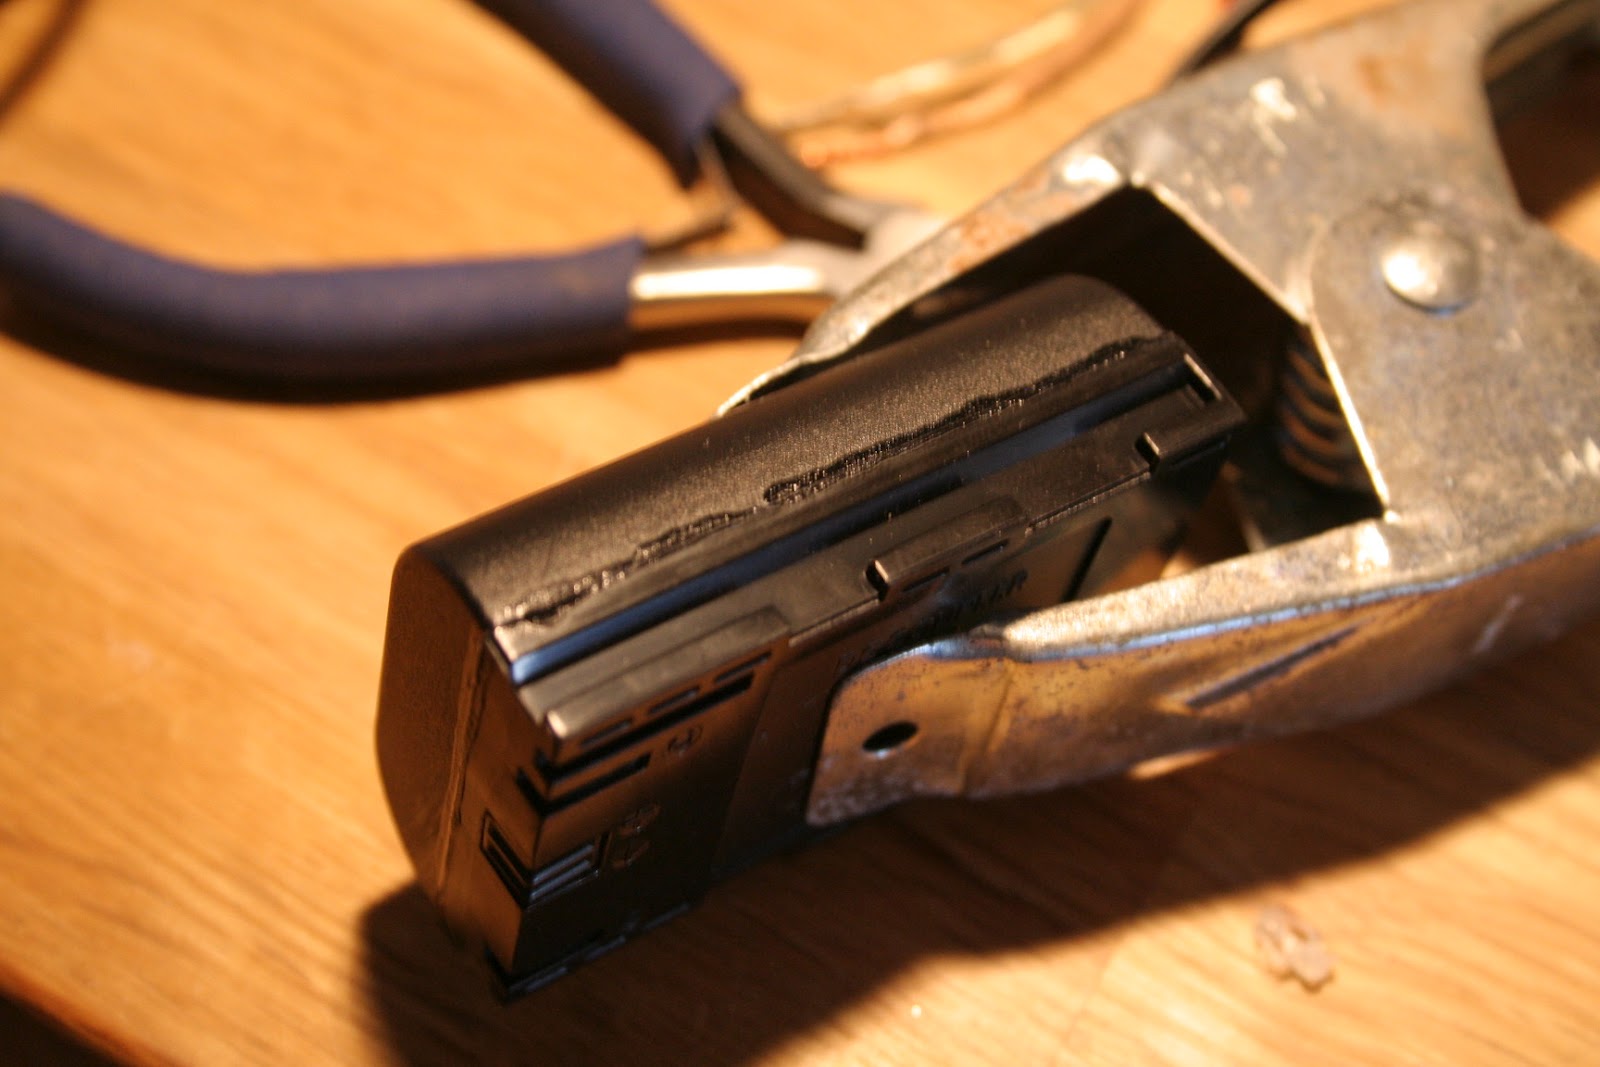
Remove Shutterblades and S8 R8 crop:
Because i planned to use video function of the 60D i removed the shutterblades. I figured the automatic exposure would have a porblem with it, and also the shutterblades in my Mark 610D run at full speed even with 3 fps film advance. I removed the shutteblades by making a weak spot with a dremel and then jus pry/break them off.


Camera and lens:
I tried at first to mount a Canon 60mm F2.8 on 3 sets of extension tubes and having the camera on a tripod. I was able to fill enough of the DSLR sensor, but there was too much problems with vibrations from the heavy lens so far off my light tripod. Instead i mounted the lens on the projector :-)
I drilled a hole in a storage dustcap for cannon lenses. Mounted it on the 610D with double sided tape. I have borrowed a nice lens: Canon 60mm F2.8. This lens is then projecting the light directly onto the 60D sensor.

On the 60D i only use extension tube to keep out light. I have mounted it on a heavy steel plate from a hardware store and use some M5 bolts and wingnuts to level the plane. I also use a cheap macro slider in between the steel plate and the camera for focusing.

The lens have F2.8, this turned out to be too narrow since i was able to focus on different layers in the film itself. Smaller hole should be able to only let light that have passed prepindicular through the film to enter the lens. And since canon dont have manual apperture i had to improvise:

I have installed a nice firmware hack called Magic Lantern on the 60D. This is a useful tool when transfering films. You get histograms, zebra marks and VU meter while recording. It is magic.
Update: I found it very hard to adjust focus using the camerabody screen. So i connected the HDMI out to a computer monitor with hdmi input. I get very good picture of the 8mm film on the monitor making it easy to adjust focus using the macro slider. When i hit record on the camera body the resolution out of the HDMI port drops to something like old VGA, but then the focus is already good.
Dynamic range:
To be able to capture the dynamic range of the film i have installed a "flat" Picture style in the 60D. I used the one from Marwel: it can be found here: http://marvelsfilm.wordpress.com/2011/01/19/finally-the-new-marvels-cine-profile-3-x-for-canon-dslr/

UPDATE: Sync cable:

Software:
Avisynth
I process the 1080p25 MOV files from the 60D using a script based on videoFred's restoration script . This guy is clever. Check out his website at http://www.super-8.be/.
My version of his script is here:
http://pastebin.com/Aiu7Zjxx
It is not pretty but it works. Input is 1080p25 video with 6 fps framerate on the Eumig 610D. Output is 18fps progressive
Virtual Dub
I open the avisynth script in virtual dub, select codec
Cineform Gopro codec ( gets installed together with the software for Gopro)
Select save AVI and then wait. :-) My computer is able to run the script and encode cineform at 1fps.
Result:
Here is a still from the video after motion stabilization, noisefiltering, colorcorrection, cropping and resize to 1280x720 . It is me and my grandmother may be 1983.

As 18 fps is not supported on vimeo i frameblended to 24fps when transcoding to vimeo.
Pretty pleased with the result. Almost Instagram quality so it should be good enough :P


 O
O